Unit turnover can really help or hurt your cash flow as a landlord. Why does missing just one repair end up costing you thousands of dollars in legal problems? And why do small issues you miss turn into big complaints from tenants? The way you handle clearing out units between tenants really matters for how fast you can get new renters in there and how well you can back up your decisions about security deposits.
Most landlords don’t like turnover day because it tends to feel like total chaos that never ends. You never know what strange items you’re going to find in the closets or what kind of damage could be hiding behind the furniture – and everything you find adds more time to your already busy schedule. Here’s a straightforward plan that covers every step so you don’t have to worry about the stress and confusion that usually come with move-outs.
The first thing you need is to go through the unit after you get those keys back and take pictures of everything. These inspection photos will be your proof if any disagreements come up later. If you skip this, you’ll be stuck trying to remember the small details while your former tenant remembers it differently than you do, and in small claims court, what you remember usually isn’t enough to win your case.
Most landlords know that photos and records can definitely help or hurt them in a deposit dispute. But plenty still rush through inspections and then wish they hadn’t.
If you skip this part, it can cost you real money when disputes come up. Deposit claims usually depend on photo evidence, and courts want to see solid proof for any deductions you make. You should schedule your inspection right after the tenant gives you the keys. Take the time to go through the place with a detailed checklist and compare everything to your original move-in report. Most landlords set aside at least two hours for this whole process.
Be sure to take photos of wear patterns on floors, wall scuffs, and how the appliances look. You want to make a complete record that shows what’s just normal wear and what’s actual damage. Phone photos have helped landlords catch early water damage behind washing machines, which saved thousands of dollars in mold cleanup costs.
It’s always worth trying to get the tenant’s signature on inspection forms whenever you can. This turns into valuable evidence if disputes end up in small claims court. Bad record-keeping has cost landlords their entire deposit claims because judges couldn’t tell what damage was there at move-out compared to move-in. When tenants sign these forms, it definitely helps you in court. Judges see signed inspection forms as proof that the tenant agrees with how the property looked at move-out. Even when you have real damage claims, they’re much harder to prove without the right photos and paperwork.
The whole process feels boring when you just want to start repairs and get the unit ready for new tenants – most of us want to jump right into the work. But once you finish this initial inspection, you can move forward into the deep cleaning phase.
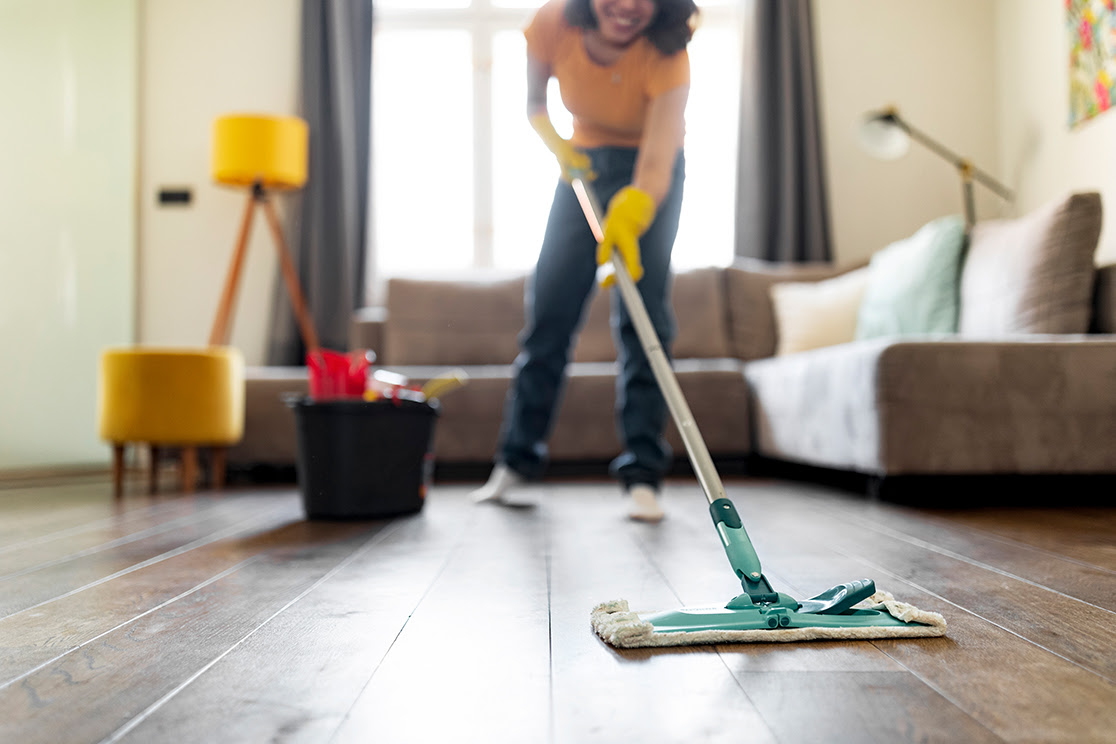
Clean Each Room with a Strategy
Once you finish your walkthrough inspection, that’s when the real work starts. You’ll need to clean each room with a solid plan instead of just bouncing around the unit without any order. Work your way from the ceiling down to the floor in each space before moving on to the next room.
Maybe you tackle the kitchen first since grease and old food buildup take the most work to get off. Be sure to wipe down the cabinet fronts and clean inside the drawers where crumbs like to hide. You need to scrub the stovetop and oven well because future tenants are going to see any burnt-on grease immediately.
Tenants are going to judge your whole place within seconds of seeing the kitchen. They’ll check the appliances and open up cabinet doors before they look anywhere else. When they see a spotless kitchen, it tells them that you take great care of the whole unit.
After that, move to the bathroom and work on that stubborn grout between the tiles. A basic bleach mix works great for this – just remember to never mix bleach with other cleaners since it’s dangerous. When you mix these together, they make fumes that can hurt you. Lots of landlords try to cover up bad smells with air fresheners. But this ends up hiding problems instead of actually fixing them.
Air fresheners just make tenants think about what you’re trying to hide underneath. When you do a complete deep clean, it gets rid of bad smells right at their source and shows that the space is actually clean.
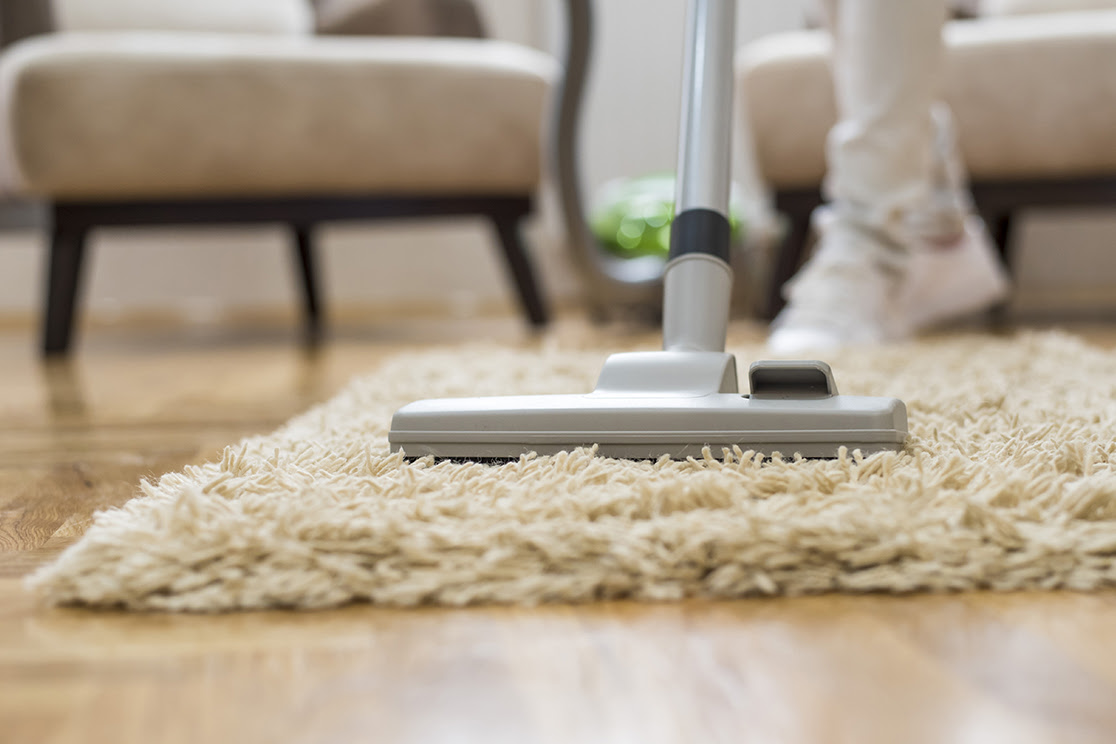
You should save the living areas for last and steam clean any carpets after you sand the baseboards. The order matters here. If you steam the carpets first and then sand, you’re just going to get dust all over the carpets you just cleaned. Trust me on this one.
Recent data shows that units that look spotless usually rent faster than ones with visible dirt or stains. When you clean a small studio versus a large family unit, the difference is mostly just time, not how you do it.
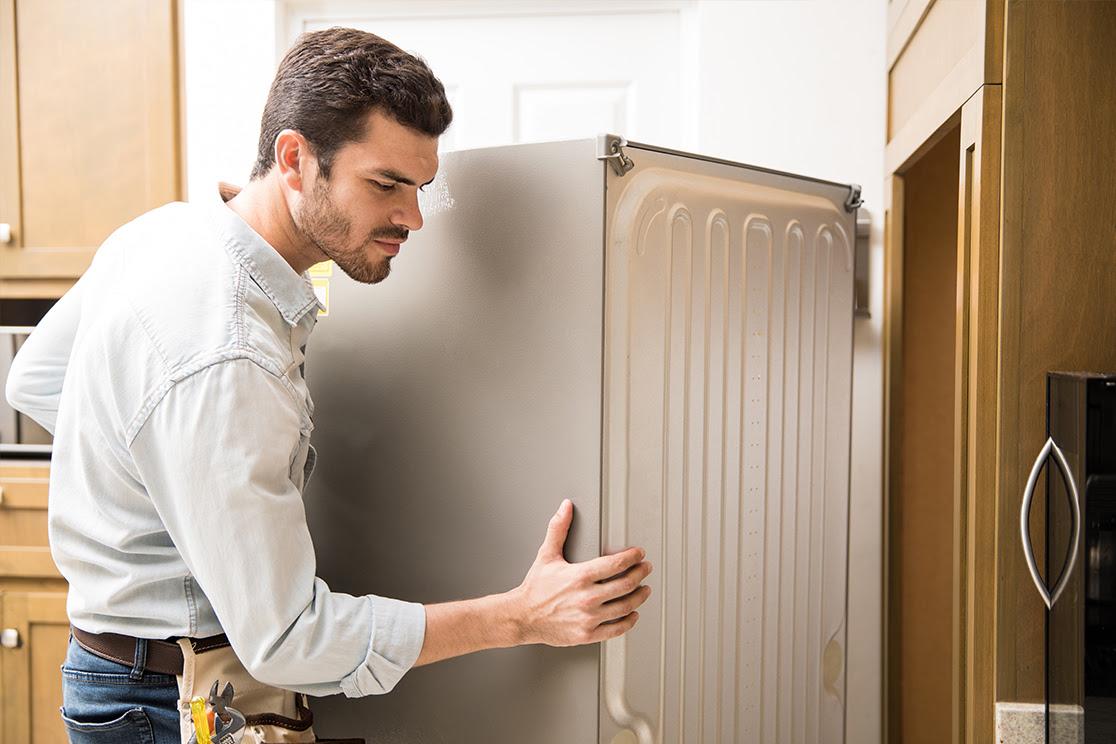
Check All the Appliances and Fixtures
When you walk into an empty unit, check out the appliances right away. That broken refrigerator seal might not look like much. But it can actually double your tenant’s electric bills. The oven with that charred sugar on the bottom will take tons of cleaning before anyone can use it again.
Before you do anything else, unplug everything. Check the refrigerator door seals to see if there are any tears or gaps where cold air could be leaking out. Look at the coils behind or underneath the fridge to see if there’s dust building up that could make the motor work harder than it should. If you hear a buzzing sound, that’s usually a sign that something’s going wrong. After you scrape out the obvious mess in the oven, you’ll need to inspect it closely. Test the burners and check that the door closes the way it should. If you see any water damage around the dishwasher, fix it right away.
You’ll also want to watch for the smaller issues that can seriously bother tenants. Faucets that drip will waste water and money, and cabinet doors that are loose can make the whole place seem run-down. If the light fixtures have burned-out bulbs, that’s going to give new tenants a bad first impression.
Small problems with appliances can turn into big problems with tenants in just a few weeks. Something that seems like it just needs basic maintenance can turn into your phone ringing during dinner with frustrated renters on the other end. The decent tenants out there have plenty of options, and they’ll go find landlords who keep their appliances in solid working order.
Take photos of everything you find before you start working on anything. This way, you’ll have proof if any questions come up later about deposits or who caused what damage. Sometimes, it makes sense to repair something. But other times, you’re better off just replacing the whole appliance.
When you’re trying to decide if you should repair or replace something, you’ll need to think about how old the appliance is and how much it’ll cost. If you have a five-year-old refrigerator with a bad seal, it’s probably worth putting in a new gasket. But if you have a fifteen-year-old unit that’s running super loud, you should probably just replace it. Your tenants will see the difference when they get their utility bills and when they’re working with the appliances every day.
If you try to save money with cheap repairs on appliances that are about to break down anyway, you’ll end up fielding emergency service calls during the holidays. But if you put in decent replacements, you won’t have to handle those midnight calls about broken freezers full of spoiled food.
Handle the Mess That Tenants Leave Behind
More than 30% of tenant deposit disputes are about pest-related damage. That’s a pretty high number, given how easy it is to avoid most of these problems. Just one takeout container that gets left behind can cause a real roach problem in only 48 hours.
Pest damage claims lower security deposit recovery much faster than other types of damage do. Every single day an infestation continues, the cleanup costs get higher and higher. Tenants will argue about charges they think are too high, and what should have been a simple turnover turns into a long legal fight.
The smell is usually the first sign when you walk into an abandoned unit. Sometimes, it’s that strange odor coming from the back of the fridge. You know that smell. Other times, it’s something worse. Either way, you can’t just spray some air freshener around and think you’re done. Start with the most obvious places like appliances and the areas where food gets stored. Pull everything out of the refrigerator and freezer, then scrub them down from top to bottom. This usually takes quite a bit longer than you might expect. Be sure to vacuum all of the corners where crumbs usually pile up. Those small bits of food are just what rodents and insects are looking for.
If you clean everything completely, you can stop pest problems from turning into rental disasters. When you leave food debris behind, you’re giving insects and rodents everything they need to start colonies. Your next tenant will absolutely blame you for any pest problems they run into.
Heavy perfumes and sprays that try to cover up smells will only work for a few days at most. When you try temporary fixes, you’re just creating bigger problems down the road. What you need to do is get rid of odors at the source with enzymatic cleaners or ozone treatments. They actually break down the compounds that cause bad smells rather than just trying to hide them.
Check your local regulations before you throw away any belongings the previous tenant left behind. Some cities have very strict requirements for how long you need to store abandoned property. The fines can get pretty expensive if you don’t deal with this correctly. When you break these regulations while dealing with abandoned property, you could end up paying thousands of dollars in fines. Every city has different requirements for storage and how long you have to wait before disposing of items. Your insurance won’t cover damages from mishandling abandoned belongings either.
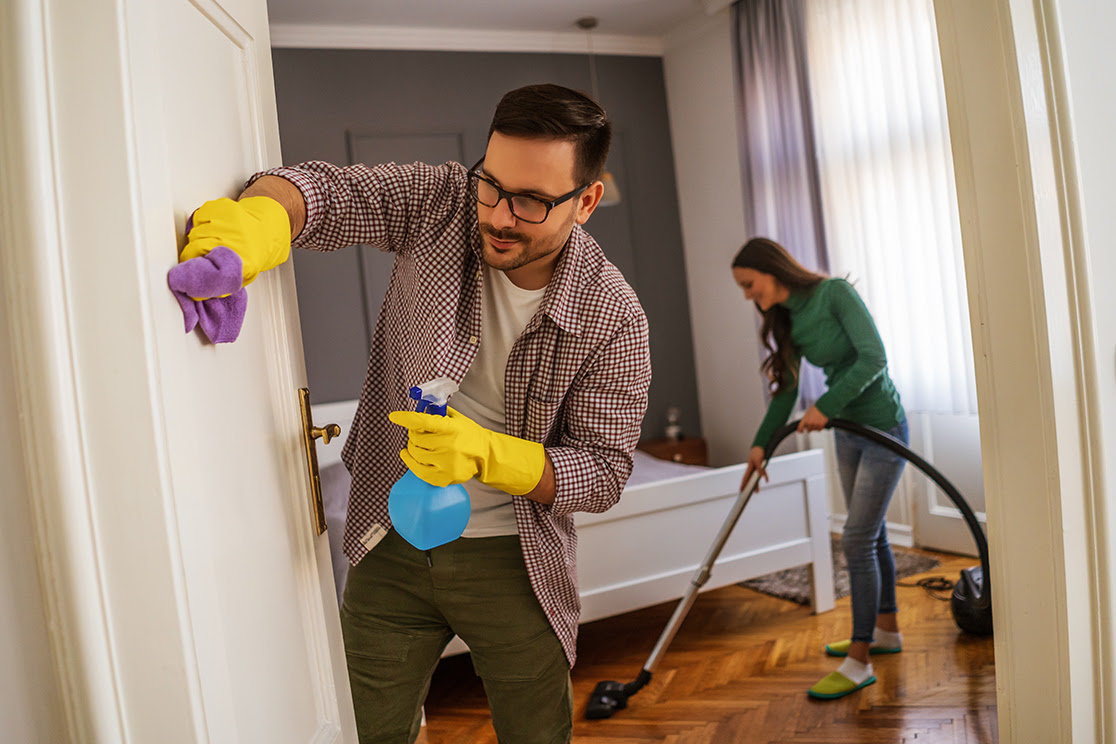
Final Touches That Speed Up Rentals
You’re almost done with the unit now. These final touches may look small. But they actually make the difference between a unit that sits empty for weeks and one that rents out in just a few days.
Start with the obvious repairs that every visitor will see first. Steam clean the carpets and make sure to patch any nail holes or scuffs in the drywall. Most people see these details within the first ten seconds. Polish the windows until they sparkle, and touch up any spots that need fresh paint. Fresh paint needs plenty of time to dry, though – so you don’t want to rush through this part.
Here’s what most landlords miss completely. Replace those old switch plates and outlet covers with brand-new white ones. It only costs maybe five dollars per room. But it actually makes the whole place look updated. New lightbulbs and fresh smoke detector batteries will finish everything off. I can’t tell you how much switch plates change the way a rental looks. Tenants look at the walls when they walk into each room. Yellowed or cracked covers make it seem like you don’t take care of the place, even when everything else looks great. This small investment shows people that you actually care about the property.
I’ve heard of landlords who put together a “turn crew” to get a two-bedroom unit ready in just 24 hours. The team takes care of the carpets while someone else re-keys the locks and replaces the HVAC filter. This approach can cut the usual vacancy time in half because the unit is ready to show the very next day. Each job leads right into the next one without any wasted time or delays. This way, you skip those times when people want to rent the place, but you’re still fixing repairs. You definitely want to have every surface clean and every system working before you schedule that first tour.
Don’t skip your final walkthrough even when you’re exhausted from all of the work. Go through the unit like someone who’s thinking about renting would, and write down what still needs work. The little details you see now are what help someone see themselves living there.
When you do your walkthrough, you’ll catch issues that listing photos just can’t show. After working on a unit for hours, it’s easy to miss small details that tenants will see immediately. Just one burned-out bulb can change how they feel about the whole property.
Need Junk Relief?
Unit turnovers don’t have to be those stressful situations that keep you up at night as you worry about missed details or unhappy future tenants. Most property managers lose way too much sleep over these transitions when they don’t need to. When you’re sure your units are ready for the next resident, that feeling of relief is worth the effort you put into building a strong turnover process.
When you look ahead to the future, it’s exciting to see how technology might continue to help make these processes run even smoother and how new laws will keep moving the industry toward being more open and fair for everyone involved. You might remember that landlord who went from three-week turnovers to just five days after he put together a solid plan – that kind of change didn’t happen overnight. His success came from working on one problem area at a time. Each improvement he made gave him more energy to work on the next change. The shorter vacancy periods meant he brought in much more money each year. But the whole process started when he took that first step toward building a more organized system.
Which idea matters most for you to work on first? Maybe you need to get your paperwork process under control, or maybe you need to finally work on that deep cleaning process that you keep putting off. Speaking of changes, when you need to throw out unwanted items and debris during your turnovers, it helps to have reliable support. That’s where JUNK Relief comes in – we’re a Chicago-based junk removal company with nearly 20 years of experience, and we provide professional service. It doesn’t matter if you need to clear out household clutter, industrial waste, or anything in between – we handle it all and make sure everything is convenient for you with honest pricing. We also have green disposal practices, which means we recycle and donate items whenever we can, which helps keep the community clean.
Tonight, take a few minutes to look over your turnover checklist and find one area where you can make improvements now. You already have a strong idea about which area needs work the most.
SHARE POST
Joe Weidman
Joe is a Chicago native, born and raised in Elmhurst. He founded Junk Relief more than 10 years ago and has worked with more than 20,000 homeowners and businesses throughout Chicagoland. His passion for starting a business in junk removal stemmed from seeing the need to do things differently. He prides himself on his company's model to provide unexpectedly professional service.